Step 1: Download the connector from Oracle/MySQL website.
Here is a link to the connector. You can actually download without registering on the website (MySQL allows this). However, if you are already a registered Oracle user, your credentials are also useable on this website.
Step 2: Locate the "jar" file
After the download, click on "Run" and the jar file will be automatically placed in the MySQL folder under Program Files directory.
Look under
C:\Program Files (x86)\MySQL

jar file is C:\Program Files(x86)\MySQL\MySQLConnectorJ\mysql-conector-java-5.1.28-bin.jar
Step 3: launch SQL Developer
Step 4: Configure the connector
The first step here is to click on "Tools" under the main menu
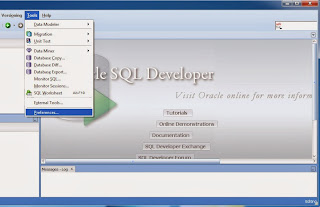
Second step is to click on "preferences"
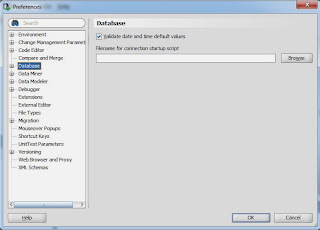
Third step is to click on "database" and select "Third Party JDBC Driver"
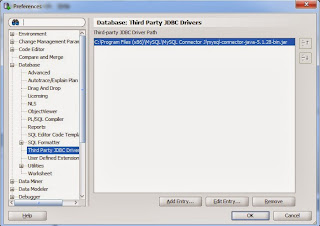
Click on "Add entry" and locate the jar file in "C:\Program Files(x86)\MySQL\MySQLConnectorJ\mysql-conector-java-5.1.28-bin.jar"
Click "OK"
From the main page, click on the connect icon.
Step 5: Click on the "connect" icon (in green) and fill in the required login information
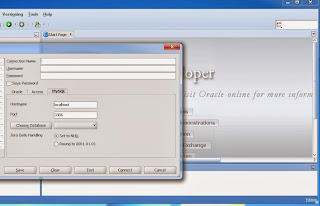
Connection name: Any name you want to call the connection
Username: This is the user account on the MySQL server, i.e. root ('root'@'localhost')
Password: user's password
Hostname: you can leave this as localhost or replace with the name of the host server. If this is a remote server, replace with IP address or hostname of the remote server.
Port: Leave this as 3306 (default). If your port number has been changed from default, you can replace with the value
Step 6: Connect to MySQL database
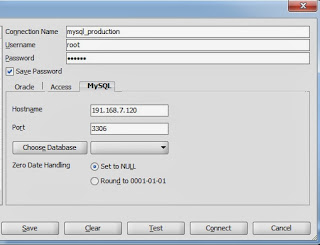
You can "Test Connection" before you save the credentials.
Thanks for reading and happy 2014!
No comments:
Post a Comment