Friday, August 22, 2014

Maintenace plan for SQL Databases

Creating a maintenance Plan for SQL Server databases is a responsibility of a SQL DBA. The reason a maintenance plan is necessary is to avoid bottlenecks that may occur because of lack of regular maintenance. 

Here are some of the regular tasks a SQL Maintenance Plan can address:

Check Database Integrity
The Check Database Integrity task performs internal consistency checks of the data and index pages within the database.

Shrink Database log files
The Shrink Database task reduces the disk space consumed by the database and log files by removing empty data and log pages.

Reorganize Indexes
The Reorganize Index task defragments and compacts clustered and non-clustered indexes on tables and views. This will improve index-scanning performance.

Rebuild indexes
The Rebuild task reorganizes data on the data and index pages by rebuilding indexes. This improves performance of index scans and seeks. This task also optimizes the distribution of data and free space on the index pages, allowing faster future growth.

Update staitstics
The Update Statistics task ensures the query optimizer has up-to-date information about the distribution of data values in the tables. This allows the optimizer to make better judgments about data access strategies.

Clean History
The History Cleanup task deletes historical data about Backup and Restore, SQL Server Agent, and Maintenance Plan operations.  This wizard allows you to specify the type and age of the data to be deleted.

Backup database
The Back Up Database (Full) task allows you to specify the source databases, destination files or tapes, and overwrite options for a full backup.

Maintenance clean up

The Maintenance Cleanup task removes files left over from executing a maintenance plan.

Launch SQL Management Studio
Expand the "Management" 

 Click on "Next"


 Choose a "Name" for the maintenance Plan. This is differentiate it from all other maintenance plans available on the SQL instance.
You could choose a single operation to run all the tasks or break them down into segments to be run separately.
Click on "Change" to choose an appropriate time to run the job.


This step is very easy. Choose your time and date you want the maintenance job to run.


At this point, you will choose all the task you want the maintenance plan to encapsulate.


Integrity test will be carried out on the databases selected.


Here you choose the databases. You can also select all databases.


You can also include indexes by checking the "include indexes" option.


Reorganizing indexes will be done on all the database selected. In this stage, you select the databases for this task. You can also choose all databases.


Here you specify the database where the indexes will be rebuilt.


At this point you define the statistics to update.


Choose the frequency and files to clean.


Choose the mode of maintenance cleanup.


Getting feedback from the maintenance process is essential because it will indicate success or failure of the process. You can choose to write a report to a text file or email report directly to you.


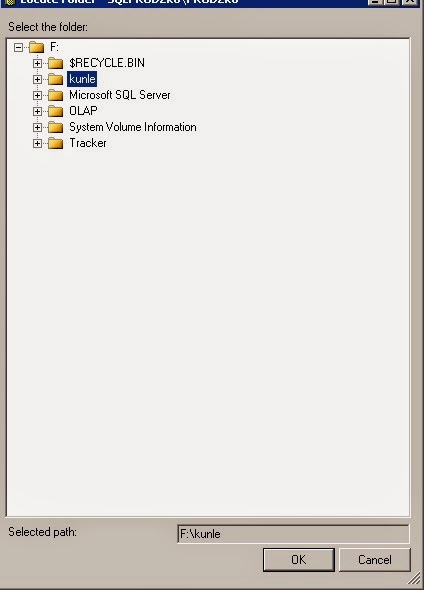
At this point, you can point to a location for storing the report.


The next screen will display a summary of all the tasks to be completed


Once the maintenance plan has been successfully created, a "Success" message appears in the next box.


The next step is to verify the Maintenance Plan.
1. Expand the "Management" menu
2. Expand the "Maintenance Plan".
You should see the maintenance plan in the dropdown list as shown in the image below.


Thanks for reading.

Tuesday, August 12, 2014

De-fragmenting indexes in SQL Server

One of the key tasks I have done to improve performance on SQL Server database is defragmenting indexes in a SQL database.

Indexes are very crucial for improving database performance because they make database searches efficient and faster.

Index problems

What are some of the issues indexes may have in a database?
There are some issues usually associated with indexes. Here are some of them:

Indexes with high fragmentation ratio: Indexes with fragmentation will cause a huge performance issue on the database.

Too many indexes on a table: Though indexes are desirable, too much of them may be a problem in a database. Index redundancy can occur from too many indexes on a table. Also, it may cause confusion as to which index to use for sql execution. Also, update statements will take a very long time to complete.

Hypothetical indexes: These are indexes created during a SQL tuning operation to improve performance. They may not be needed after the query is executed.

Unnecessary index: creating an index on a very small table is not recommended because it amounts to misuse of resources. 

Databases identified with one or more tables, with indexes that may require update statistics: If statistics of an index is not updated, there could be a performance issue.

There are foreign keys with no supporting indexes: It is best practice to create an index to support foreign keys.

Indexes have been identified with an index key larger than the recommended size (900 bytes): Index keys should not be greater than 900 bytes.

High number of Full Scans versus Index Searches: This is a clear case of lack of index on a table.


Rebuilding an index

You can use the GUI tool to rebuild an index.


Retrieving Fragmentation info on all indexes

--Use this script to get all the information about all the tables and indexes in a database. You should use this list to prepare a collation of all indexes to defrag in a database. 
You can also use this list to set a threshold of defragmentation based on the trend.

-- Declare database
use Patientdatadb
go

-- Show fragmentation per table
SELECT dbschemas.[name] as 'Schema',
dbtables.[name] as 'Table',
dbindexes.[name] as 'Index',
indexstats.avg_fragmentation_in_percent,
indexstats.page_count
FROM sys.dm_db_index_physical_stats (DB_ID(), NULL, NULL, NULL, NULL) AS indexstats
INNER JOIN sys.tables dbtables on dbtables.[object_id] = indexstats.[object_id]
INNER JOIN sys.schemas dbschemas on dbtables.[schema_id] = dbschemas.[schema_id]
INNER JOIN sys.indexes AS dbindexes ON dbindexes.[object_id] = indexstats.[object_id]
AND indexstats.index_id = dbindexes.index_id
WHERE indexstats.database_id = DB_ID()
ORDER BY indexstats.avg_fragmentation_in_percent desc

Result should list all the indexes on all the tables in each database along with the fragmented percentage. 


DeFragmenting all indexes in a database

To defragment all indexes in a database that are fragmented above a declared threshold, you can use the script below:

Please note that my threshold in my script is set to 30%


-- Declare database
use Patientdatadb
go 
-- Declare variables
SET NOCOUNT ON;
DECLARE @tablename varchar(255);
DECLARE @execstr   varchar(400);
DECLARE @objectid  int;
DECLARE @indexid   int;
DECLARE @frag      decimal;
DECLARE @maxfrag   decimal;

-- Declare maximum fragmentation to allow
SELECT @maxfrag = 30.0;

-- Declare a cursor
DECLARE tables CURSOR FOR
   SELECT TABLE_SCHEMA + '.' + TABLE_NAME
   FROM INFORMATION_SCHEMA.TABLES
   WHERE TABLE_TYPE = 'BASE TABLE';

-- Create the table
CREATE TABLE #fraglist (
   ObjectName char(255),
   ObjectId int,
   IndexName char(255),
   IndexId int,
   Lvl int,
   CountPages int,
   CountRows int,
   MinRecSize int,
   MaxRecSize int,
   AvgRecSize int,
   ForRecCount int,
   Extents int,
   ExtentSwitches int,
   AvgFreeBytes int,
   AvgPageDensity int,
   ScanDensity decimal,
   BestCount int,
   ActualCount int,
   LogicalFrag decimal,
   ExtentFrag decimal);

-- Open the cursor
OPEN tables;

-- Loop through all the tables in the database
FETCH NEXT
   FROM tables
   INTO @tablename;

WHILE @@FETCH_STATUS = 0
BEGIN
-- Do the showcontig of all indexes of the table
   INSERT INTO #fraglist
   EXEC ('DBCC SHOWCONTIG (''' + @tablename + ''')
      WITH FAST, TABLERESULTS, ALL_INDEXES, NO_INFOMSGS');
   FETCH NEXT
      FROM tables
      INTO @tablename;
END;

-- Close and deallocate the cursor
CLOSE tables;
DEALLOCATE tables;

-- Declare the cursor for the list of indexes to be defragged
DECLARE indexes CURSOR FOR
   SELECT ObjectName, ObjectId, IndexId, LogicalFrag
   FROM #fraglist
   WHERE LogicalFrag >= @maxfrag
      AND INDEXPROPERTY (ObjectId, IndexName, 'IndexDepth') > 0;

-- Open the cursor
OPEN indexes;

-- Loop through the indexes
FETCH NEXT
   FROM indexes
   INTO @tablename, @objectid, @indexid, @frag;

WHILE @@FETCH_STATUS = 0
BEGIN
   PRINT 'Executing DBCC INDEXDEFRAG (0, ' + RTRIM(@tablename) + ',
      ' + RTRIM(@indexid) + ') - fragmentation currently '
       + RTRIM(CONVERT(varchar(15),@frag)) + '%';
   SELECT @execstr = 'DBCC INDEXDEFRAG (0, ' + RTRIM(@objectid) + ',
       ' + RTRIM(@indexid) + ')';
   EXEC (@execstr);

   FETCH NEXT
      FROM indexes
      INTO @tablename, @objectid, @indexid, @frag;
END;

-- Close and deallocate the cursor
CLOSE indexes;
DEALLOCATE indexes;

-- Delete the temporary table
DROP TABLE #fraglist;
GO

Friday, August 1, 2014

Bulk data loading into SQL Server Database from Excel

The easiest way to load bulk data into SQL database is the commandline. Open the MS Management Studio New Query and run this command:

BULK INSERT dbo.MyTestDB FROM 'C:\Testfolder\Importfile.txt' 
WITH ( FIELDTERMINATOR =',', FIRSTROW = 2 )

or

BULK INSERT dbo.MyTestDB 
FROM 'C:\Testfolder\Importfile.txt' 
WITH
(
FIELDTERMINATOR = ',',
ROWTERMINATOR = '\n'
)
GO

Where dbo.MyTestDB is the table and 'C:\Testfolder\Importfile.txt' is the excel file

Also using MS Management Studio, it is very easy to load bulk data into SQL server database using the Import/Export GUI wizard.

Here are quick steps to follow to load database (csv or xls or xlsx) using GUI:

Step 1: Verify columns
You need to verify the columns on the table and match with data on the excel spreadsheet


Step 2: Run import wizard
Right-click on the table and choose "Import Data". This will launch the "Import/Export" wizard for SQL database.


The import wizard will open and will guide you through the whole data import process. Just follow the guide and you should be fine.


Step 3: Choose Source Host and database
The source host is the server name or hostname of the server where the data will be exported. Once the hostname has been specified, the database should automatically appear among the list in the dropdown. Choose the database you want to export from.


Step 4: Select source Table(s)
At this point, you need to select the source and destination tables. You can choose multiple tables at the same time.
Source is the table where data will be exported/copied from
Destination is the table where data will be imported/loaded


Step 5: Map the columns
At this point, you can map or edit the columns to be imported/exported.
You can use "Edit SQL" to edit how the table will be loaded.
Check "Source" to verify the source table.
Check "Destination" to verify the destination table.
If table is not already existing, SQL can create a new table when you check the radio button "Create destination table".
There is also an option to "Drop and recreate destination table".
To skip column(s), click on the destination column and change to "null".


Step 6: Feedback
This last page shows the confirmation that the data load was successful.

Thanks for reading!

Tuesday, July 29, 2014

Restoring SQL database from a backup file

Restoring a database require skills. You can use commandline or GUI tool to restore a database. Please take note of this:

1. You can restore a database from a backup file (.bak file);
2. You can restore a database from a backup file to a fresh database (database will be created during the process); and
3. You can use database restore from backup as a Data Migration (DM) or Disaster Recovery (DR) plan.

Syntax for restore:
--To Restore an Entire Database from a Full database backup (a Complete Restore):
RESTORE DATABASE { database_name | @database_name_var }
 [ FROM <backup_device> [ ,...n ] ]
 [ WITH
   {
    [ RECOVERY | NORECOVERY | STANDBY =
        {standby_file_name | @standby_file_name_var }
       ]
   | , <general_WITH_options> [ ,...n ]
   | , <replication_WITH_option>
   | , <change_data_capture_WITH_option>
   | , <FILESTREAM_WITH_option>
   | , <service_broker_WITH options>
   | , <point_in_time_WITH_options—RESTORE_DATABASE>
   } [ ,...n ]
 ]
[;]


Example of restore situation:

Using comandline, type the following to restore a database from a backup file:

RESTORE DATABASE TestPatient FROM DISK = 'C:\Testbackup.BAK'
GO

Using the GUI tool is the easiest, but you have to be careful of any option you're choosing.

Step 1: Right click on "Database" menu and select "Restore Database". 
A new dialogue box will appear with various options. This wizard will guide you through the whole database restore process.
NOTE: Make sure your backup file (.bak file) has been copied to the server and you have the required privilege to open the file or write on the file location.


Step 2: This is where you specify the database name. 
If you want to create a new database for this restore process, type in the database name.


Step 3: Source
Under the "Specify source" option, choose "From device" from the radio button and click on the menu on the right corner to expand your options.


Step 4: Add file
Click on "Add" to point the location of your file


Step 5: Choose file
From the box, choose the backup file. The file usually will have a ".bak" extension. Ensure the the correct file is selected, otherwise the restore will fail.
Click "OK" to continue


Step 6: Select file
Once the file the has been selected, click "OK" to move to the next step


Step 7: Restore
At this point, check the "Restore" box to indicate the exact file the database will be restored from, and then click "OK"

Step 8: Run process
Once you click "OK", the restore process runs. You can monitor the restore process through the "Completion" rate on the left tab. It will display in percentage the rate of completion.


Step 9: Done
Once the restore is completely done, you will get a message like this: "The restore of database XXX completed successfully".

Step 10: Verify
To verify that the restore was successfully completed, click on Databases and look from the newly created database in the drop-down.

Thanks for reading!

Friday, June 27, 2014

Managing a database in SQL Server

One of the awesome tools I have used in my many years of managing databases is the Microsoft Management Studio for SQL Server.

LOGIN

To launch SQL Server Management Studio, click on Start > Program > SQL Server Management Studio


Once it launches, you will be prompted for login. Take note of the followings:

Server type: Database Engine
Server name: Name of your server, e.g. BINGO.uacd.edu
Authentication: This could be Windows authentication or Database. You need to create a database user prior to using database authentication. I will address how to create a user in another post.


CREATING A DATABASE 

After logging into  SQL Server Management Studio, you can create a database by simply right clicking on the database dropdown under the SQL Server Instance. Click on "New Database". A new window pops out and will allow you to name and customize the database.

In this window, you can name the data files and add more options:


TO CREATE A DATABASE USING COMMAND

Login into MS Management Studio, open a New Query Window and run this command:

USE [master]
GO
CREATE DATABASE [kunle] ON  PRIMARY 
( NAME = N'uacd', FILENAME = N'F:\Microsoft SQL Server\MSSQL10_50\MSSQL\DATA\kunle.mdf' , SIZE = 8421632KB , MAXSIZE = UNLIMITED, FILEGROWTH = 102400KB )
 LOG ON 
( NAME = N'uacd_log', FILENAME = N'F:\Microsoft SQL Server\MSSQL10_50\MSSQL\DATA\kunle_1.LDF' , SIZE = 4209664KB , MAXSIZE = 2048GB , FILEGROWTH = 10240KB )
GO
ALTER DATABASE [kunle] SET COMPATIBILITY_LEVEL = 100
GO
IF (1 = FULLTEXTSERVICEPROPERTY('IsFullTextInstalled'))
begin
EXEC [kunle].[dbo].[sp_fulltext_database] @action = 'enable'
end
GO

ADDING OPTIONS

You can also add more options to the newly created database. Login into MS Management Studio, open a New Query Window and run this command:

USE [master]
GO
ALTER DATABASE [kunle] SET ANSI_NULL_DEFAULT OFF 
GO
ALTER DATABASE [kunle] SET ANSI_NULLS OFF 
GO
ALTER DATABASE [kunle] SET ANSI_PADDING OFF 
GO
ALTER DATABASE [kunle] SET ANSI_WARNINGS OFF 
GO
ALTER DATABASE [kunle] SET ARITHABORT OFF 
GO
ALTER DATABASE [kunle] SET AUTO_CLOSE OFF 
GO
ALTER DATABASE [kunle] SET AUTO_CREATE_STATISTICS ON 
GO
ALTER DATABASE [kunle] SET AUTO_SHRINK OFF 
GO
ALTER DATABASE [kunle] SET AUTO_UPDATE_STATISTICS ON 
GO
ALTER DATABASE [kunle] SET CURSOR_CLOSE_ON_COMMIT OFF 
GO
ALTER DATABASE [kunle] SET CURSOR_DEFAULT  GLOBAL 
GO
ALTER DATABASE [kunle] SET CONCAT_NULL_YIELDS_NULL OFF 
GO
ALTER DATABASE [kunle] SET NUMERIC_ROUNDABORT OFF 
GO
ALTER DATABASE [kunle] SET QUOTED_IDENTIFIER OFF 
GO
ALTER DATABASE [kunle] SET RECURSIVE_TRIGGERS OFF 
GO
ALTER DATABASE [kunle] SET  DISABLE_BROKER 
GO
ALTER DATABASE [kunle] SET AUTO_UPDATE_STATISTICS_ASYNC OFF 
GO
ALTER DATABASE [kunle] SET DATE_CORRELATION_OPTIMIZATION OFF 
GO
ALTER DATABASE [kunle] SET TRUSTWORTHY OFF 
GO
ALTER DATABASE [kunle] SET ALLOW_SNAPSHOT_ISOLATION OFF 
GO
ALTER DATABASE [kunle] SET PARAMETERIZATION SIMPLE 
GO
ALTER DATABASE [kunle] SET READ_COMMITTED_SNAPSHOT OFF 
GO
ALTER DATABASE [kunle] SET HONOR_BROKER_PRIORITY OFF 
GO
ALTER DATABASE [kunle] SET  READ_WRITE 
GO
ALTER DATABASE [kunle] SET RECOVERY SIMPLE 
GO
ALTER DATABASE [kunle] SET  MULTI_USER 
GO
ALTER DATABASE [kunle] SET PAGE_VERIFY CHECKSUM  
GO
ALTER DATABASE [kunle] SET DB_CHAINING OFF 
GO


DELETING A DATABASE 

Using command to delete a database, login into MS Management Studio, right click on the database and select "Delete".

This will open another box where you customize the operation as shown the the snapshots.


For command option, login into MS Management Studio and open a New Query Window.


Then issue this command:

USE [master]
GO
EXEC msdb.dbo.sp_delete_database_backuphistory @database_name = N'kunle'
GO
USE [master]
GO
DROP DATABASE [kunle]
GO